Joan Miro and self-portraits (for kids)

Are you an art docent?

Teach kids about Joan Miro this month! This project introduces Joan Miro & self-portraits and it is recommended for kids in K-2 grades.

111 113 115

Silly Self portrait

Start with a  presentation.

When you introduced Joan Miro and his work to the kids, ask them to sketch a head (with a sharpie). Show kids that they can do whatever shape they want (you may even sketch those on a blackboard – oval, square, heart…) and then show them how to make the eyes and the U-shape nose.

miro 116 15 17

Then the kids can create whatever body shape they want. Just remind them to keep it simple and when they are done to ‘divide’ it or ‘visually cut’ it into several segments (they are going to be coloring each of them differently so they want to have several of them).

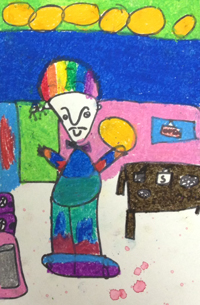
When they are done, give them the oil pastels (yellow, red, blue, green, black and white) and ask them to color the picture (not the background). The ones that finish early can add their favorite animal or something they like to do (soccer ball, books, etc.).

In the end, ask the kids to bring the picture over and spray it (with them) with the watercolor spray (just some watercolors in a spray bottle). For this part, make sure you have something covering the surrounding area (newsprint, mat, shower curtain or old plastic tablecloth). And be careful when you lift the picture – the watercolor may drip a little.

16 label

DONE!

Here are the labels to print out for this project and attach them to kids’ artworks.
Quill and ink birds

harper_quill

Handmade quills dipped in ink. There beautiful birds were made by students from Lake Stevens and inspired by arTree’s February issue dedicated to Charley Harper and birds. The kids looked for simple ways to capture the birds – the least amount of elements that still made the bird recognizable: minimal realism. Aren’t they beautiful?!

Texture and Little Artists

Little Artists explored texture this week. We have learned about Claes Oldenburg and his funny sculptures. From fuzzy Popsicle to the ice cream cone on top of a building (he is always a super easy sell to the kids, no matter how old they are).

texture

Then we explored different textures and created a mixed media collage of a burger. Kids loved to cut and glue all the different materials onto their super-tall burger! I pre-cut the pieces to make it easier for the kids. We had papers with punched holes for cheese, green plastic bags for lettuce, red streamer for ketchup, foil for fish… a lot of stuff for everybody!

texture2

After that we started working on one more project: cake candle holder. I love engaging kids with clay. It is very different that play dough and I believe it is important for them to be able to explore that difference. They pinched it, rolled it, squeezed it and when it resembled a shape they wanted, they added small details with a stick and stuck a candle in the middle. When the creations dry in a couple of days, they will paint it.

If you would like to learn more about Oldenburg, clay cakes, paper food and much more food-related fun – check out October’s issue of arTree.

Charley and potato birds

Charley Harper was an illustrator and a graphic designer. He grew up on a farm and though he didn’t like working there, he loved walking through the woods and looking for birds and other animals he could draw. And he drew, sketched and painted a lot of them and in quite a different way than anybody before him.

harper2

His style is called minimal realism. It is what happens when you simplify the birds (or other objects) as much as you can BUT people are still able to recognize what kind of a bird it is. Harper always said that he did not ‘count the feathers, only the wings.’ And you can clearly see it here:

harper3 harper4 harper5

And how did Charley draw his birds? What technique did he use? A serigraph (or screen printing or silkscreen). What is it?

harper6

The result of this technique is a print made using a stencil, woven mesh and paint. It works like this: you use a mesh and a stencil to create your print. You keep adding layers, one stencil and one color at a time until you are done.

The project inspired by Charley is simple: we are printing birds and simplifying them even more. We use potato and carrot stamps to create the birds and a toilet-paper roll to make the tree. Just cut the potatoes in halves, quarters and eighths, use a brush to apply paint to them and stamp them to create your unique birds.

Here is an example of the project. As always, you can find more details, variations and ideas in February’s issue of arTree.

harper1

If you want to teach this lesson, you can download the power point presentation here: http://1drv.ms/1ghHGsz

How to Avoid Mistakes When Teaching Art to Kids

Today, I was a guest blogger on Harrington Harmonies. I have written a post about common mistakes in teaching art to kids. It is accompanied by arTree digital magazine give-away so if you are interested, click here to enter it (it ends 2/24/2014).

Here is the post:

How to Avoid Mistakes in Teaching Art | Harrington Harmonies

The basics?

Don’t copy the masters but use them as your inspiration.

Mistakes When Teaching  Art- Don't copy artisits, use learning about the m teach a skill. {Artree guest post and giveaway} | Harrington Harmonies't  

Don’t help your kids too much, let them make their mistakes on their own!

Be ok with making a mess and not always creating the best masterpiece possible

Be careful how you praise their work!

And most importantly: have fun!

Visit Harrington Harmonies to read more about it and to win the give-away!

100th Day of School with a Burger

Today, in our art docent program – we have celebrated 100th day of school with Kindergarteners! And what better way to do it than to take them all for a burger? Especially since they make it themselves and then can proudly hang it on the wall.

oldenburg_collage

We talked about Claes Oldenburg and his Store (gallery where everything was for sale, even the register). We have followed October issue of arTree and discussed how he created ordinary objects in a fun new way: dropped ice cream on top of a building, huge soft fabric cake, fuzzy Popsicles, plastic fries… and a BLT that you have to build every time you want to move it.

oldenburg1-b1d6320794105b4c86e5d7ae7e26f3843edbc2ee-s6-c30 376353091_b0789d1004  2_claes-oldenburgs-floor-cake pop31

2002.255a-s_oldenburg_imageprimacy_compressed_600 th

And then we went on creating our burgers. It is a great texture exercise as well! We used paper, streamers, foil, foam, plastic bags, cardboard and more. Don’t they all look delicious?

I-Spy Louise Nevelson!

texture

Texture and collaborative art project based on Louise Nevelson. It was one of the most fun and (surprisingly) quiet activities.

We talked about different textures and then went through a table filled with collected treasures to find the ones kids liked. They worked in groups of 3-4 kids. They glued all of the stuff they wanted onto a big piece of cardboard and then painted over it with white or gray acrylics.

We are planning on hanging those in the school’s art show this year along with an I-Spy game. We want to engage the viewers and let them really look for the hidden objects in the Nevelson’s inspired collages. Try it out:

nevelson_i_spy


Little Artists and Shapes

Shape and preschoolers – one of the easy lessons that are fun for everybody!

We have started talking about the difference between organic and geometric shapes and looked at a way some famous artists used them in their work. From Matisse (organic) to Herbin (geometric):

matisse

We have also played a shape scavenger hunt in the classroom and did some physical movement exercise while we sorted objects based on their shapes.

For the art projects, we made two of them.

shape

We guessed what shape would a thumbprint make and then talked about ways we can change it into a dog, cat, flower, person, bug, tree, etc.

For the main project, we used colorful circles to create a collage. We practiced cutting and gluing, talked about composition and colors. We also introduced fractions a little bit – talking about different ways you can cut the circle and how many pieces it will make. Some kids cut the circles in halves or quarters others cut it into a million small pieces. Fun all around!

Paper Birds of Diana

February issue of arTree magazine is out! Do you want to learn all there is to learn about birds, including Diana’s amazing paper sculptures?

9951408065_cdbde26921_k 6924311775_d1d1fb8c95_o 6815884006_813eae9e36_k

7600499578_79304dcfdd_k 8705493251_1539b13623_k 8749570262_d7af7dd755_k

Why birds?

One day Diana was walking on the beach and for the first time in her life she saw a swan. It was fighting with a couple of ducks and its flight and expression was amazing. She was fascinated. As soon as she came home she picked up some paper and tried to capture it while it was fresh I her head. After that she just couldn’t stop.

Learn more about her amazing work and the inspiration behind it! Subscribe today: http://artreekids.com/

9377082224_a13777f5ba_o

See more of Diana’s work at her website!

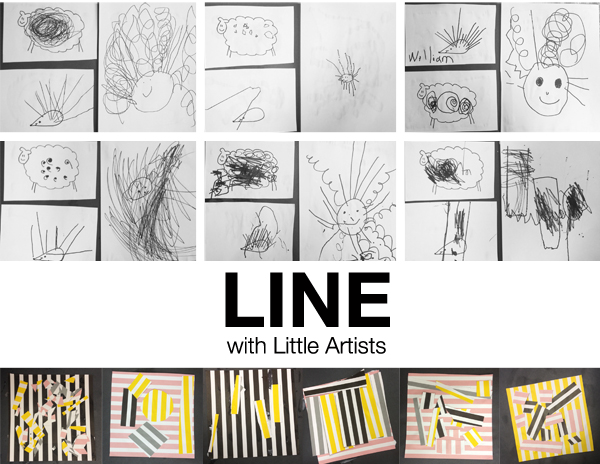
Line with Little Artists

Basic Art Elements with preschoolers. Lesson one:line.

line

In this lesson we made our own book about line. I put together presentation with works of famous artists, different types of lines and all of that… and after we talked about line for a while, we did a little exercise. We added wavy and curly lines (free-hand) on our sheep and straight lines with a ruler – on our hedgehog.

Then we combined all of the lines we talked about into the ‘crazy hair day’ picture.

We have also looked at Op Art and created a collage out of a stripped scrapbook paper. They all loved cutting and gluing! Some of them really got into it and did not want to give up their scissors for a while 🙂

What else? We have also played around with yarn – trying to make different lines (and shapes) out of it… we even walked on the lines to combine some art with gross movement exercise (and to let them stretch after 40 minutes of drawing and cutting and gluing).

The best part was combining all of the pictures together and making the book. They were very proud as they were carrying it home. I think now we have to do this every time…